20 DIY Ideas For Valentines Day Gifts For Him
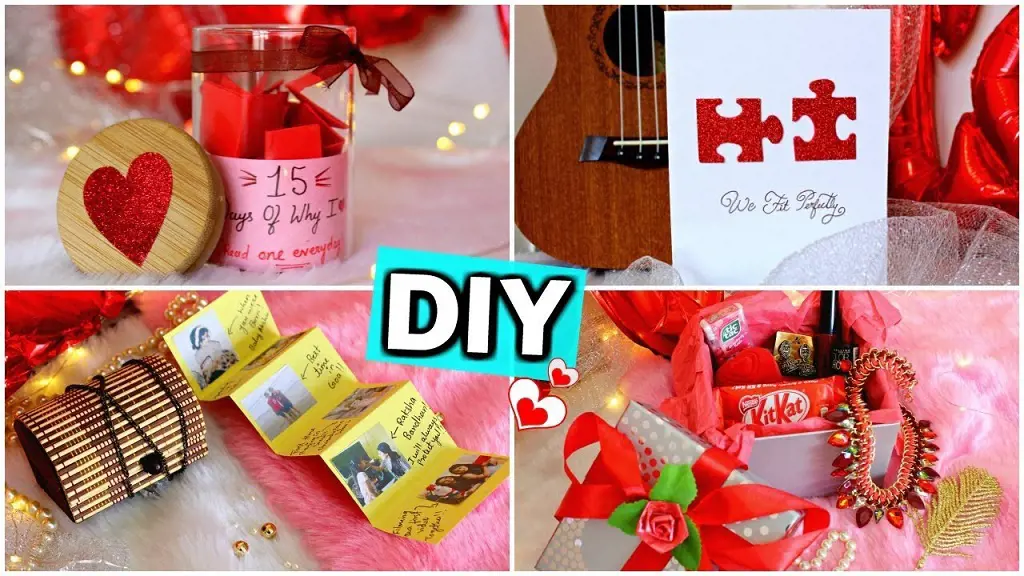
DIY Ideas for Valentines Day gifts for him include customized light bulbs, Photo Coasters, Crochet bouquets, Decorative mugs, and more.
Are you bored of buying expensive gifts, roses, and chocolates for February 14? Then, you are here in the right place to surprise your man.
This year just skip the stores and grab up some unique and outstanding ideas for making homemade gifts as per his liking.
Homemade gifts are far better than those you buy from the market. Let's express how you love your man with DIY creations. Even if it is to make crafty things or to bake some cakes and cookies they will surely appreciate the effort, time creativity and love you have put into it.
1. Photo Coasters
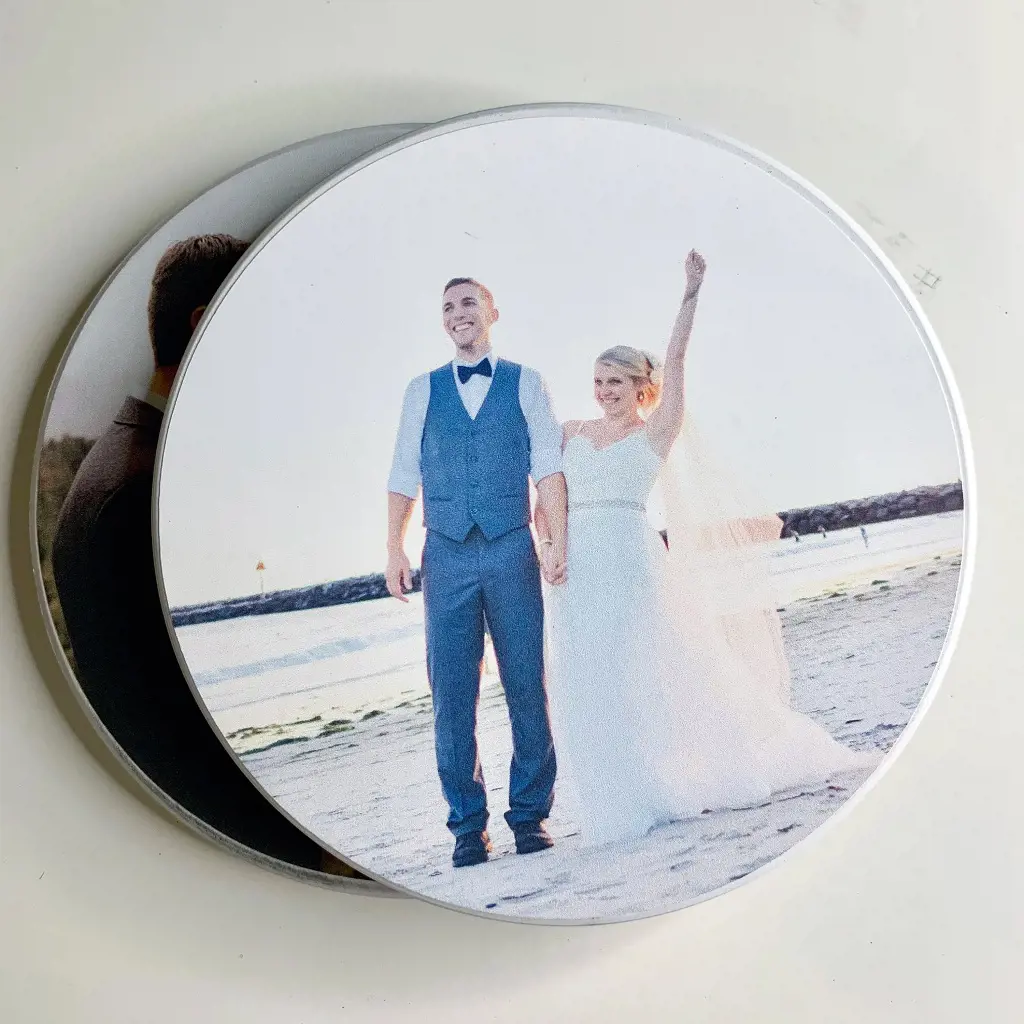
One of the best DIY Valentine's Day gifts for him is a set of photo coasters. Make your handmade gift more special and interesting by making this one.
Photo coasters are a great collection of the memories you both have created along. Try this coaster using a picture that symbolizes the love of your relationship. They are actually so easy to make.
Things Required to Make Coasters:
- Ceramic tiles or Coasters that are found readymade in the market.
- Small foam paintbrushes
- The collected pictures of yours that you want customized.
- Glue or double-sided tape
- Gloss Coat, or Shiny nail polish.
How to Make Photo Coasters?
- First of all, paint the unfinished side edges of the coasters to look more attractive.
- Once the coaster is dried, then collect the pictures you have chosen to be customized.
- Now you have everything ready all you need is to take any set of photo paper and cut each photo into the shape you are going to make.
- The next one is just to attach the photo pieces onto the blank coasters or ceramic tiles using hot glue or some double-sided tape.
- Be sure not to rush. Once your pictures are safely attached to the coasters, trim out the edges so that they can fit perfectly in them.
- You can also make it shiny by adding a gloss coat or shiny nail polish on top of them. For this, you just need to take a small paint bottle, fill it with this and spray slowly.
- Let them dry overnight and the coaster is ready to give to your Valentine.
2. Valentine’s Day Card
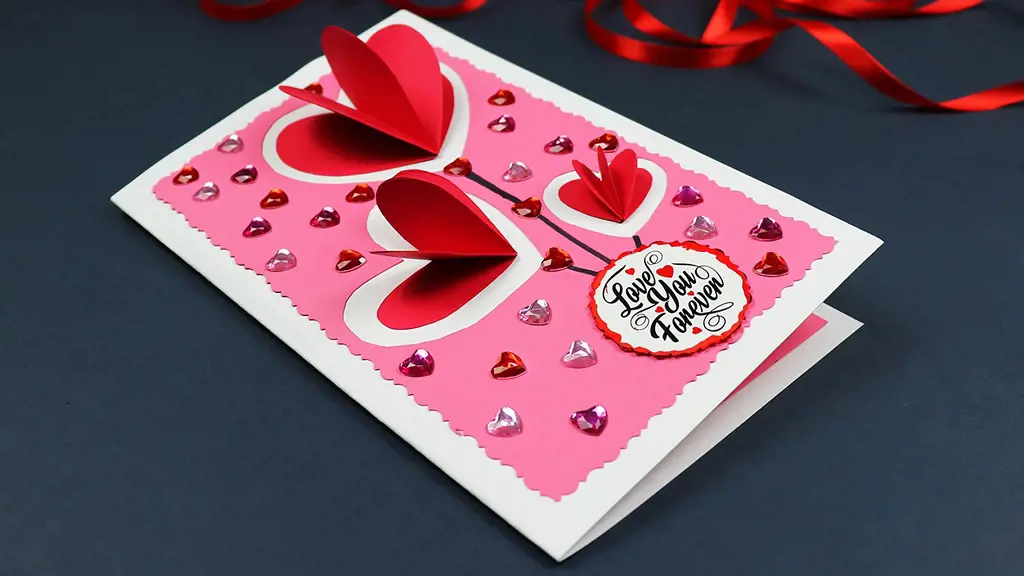
The Valentine's Day Card can be another of your DIY gift for your loved one. This is the best way to express your affection.
A homemade card for them is going to make their day full of happiness. You can create your own idea for the card. For example, you can include a love letter written on your own or some drawings, watercolor hearts, or something interesting.
The best part about this is that it requires a few materials.
Things Needed to Make Card:
- One sheet of A4 paper, two pieces of card stock, or any other colorful one.
- Scissors or paper cutter.
- Glue stick if you want to attached some photos or stickers, and scissors.
- Colorful colors, markers, or attractive ribbons if you want to make it extra attractive.
Once you have everything prepared, follow the given instructions for this easy and romantic gift for him.
Here, I am going to make a pop-up card but you can customize it in the way you want.
How to make Valentine's Day Card?
- Fold both pieces of card stock in half.
- Cut in six places with 2-inch slits into the fold of the inner piece to make the pop-up stands. Leave extra space between pop-ups.
- Now, put some glue in the inner card to the shell. Fold out the cut pieces to make pop-up stands.
- Then, cut out heart shapes or any other you prefer from the colorful paper and attached them onto the pup-up stands with the help of glue. Here, you can add other decorative things to make it more attractive.
- Write your message or some events, dates, or any other things that are related to your relationship.
- Decorate the front side of your card using your creativity.
3. Crochet Bouquet
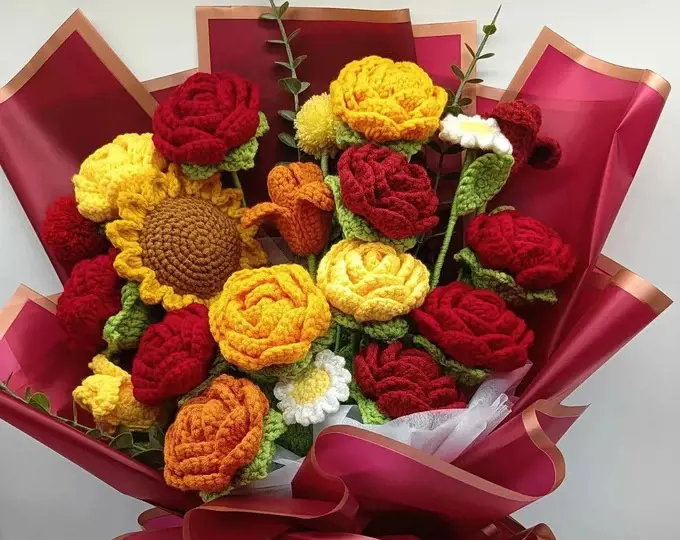
Everybody would love getting a bouquet now this might be our next DIY for this Valentine. A handful of crochet bouquets sounds quite interesting.
Crochet Bouquet might be the best gift as it will remain for life long. Flowers are seen as symbols of joy and pleasure. Different colors of flowers bring different meanings.
They are quick and easy DIY made for trying out new yarns with all your loved one's favorite colors.
Things Required to Make Crochet Bouquet:
- Size G Crochet Hook
- Worsted weight yarn in at least four different colors.
- Small buttons for the center of the flower
- Tapestry needle
- Floral wires or jewelry wire
- Washi tape of floral tape
- Additional flowers
- Mason Jar is optional.
How To Make A Crochet Bouquet?
- Go for making patterns of the flower that you love. When you are done with the pattern you will have a bunch of petals.
- Starting with your first petal start to twist them around in a spiral. Hold the top down with your thumb and forefinger to hold it in place while you open out the petals.
- After that using a tapestry needle, weave your tail up through the flower, protecting the petals together. Just weave your needle in and out a couple of times so the petals stay in place. Don't forget to add your button.
- Now, you are ready to put the stem of your pretty flowers. Here, use your jewelry wire or washi tape, or floral tape.
- Cut a long piece of wire and just fold it in half. Slip it through the bottom of your flower.
- Twist the two pieces of the flower together and fold up the bottom part of the wire so that it won't poke out. Wrap tape around the wire.
- Once you make a bunch of these ones, you are ready to tie the stems on it with ribbons or you can place it in a mason jar.
4. Homemade Valentine’s Cupcakes

Valentine's is not just about gifts and surprises but also about some delicious chocolatey dishes. This year you can make homemade chocolate cupcakes.
As we all know that good food makes a good mood and chocolate is always a symbol of love. Then, why not bake some cute chocolate cupcakes with the heart shape toppings?
Along with chocolates, you can get your flavor to make it more delicious. The combination of chocolates and raspberries can also be tried once.
Making and decorating homemade cupcakes is simple. With just a little bit of effort, you can make a big impact on how much you care about those you love.
Ingredients To Make Cupcakes:
- 125g caster sugar
- 125g butter, softened
- 125g self-rising flour
- 2 large eggs
- 1tsp vanilla essence
Tools Needed For Making Cupcakes:
- Mixing Bowl
- Weighing scales and measuring spoon
- Electric hand mixer, stand mixer, or wooden spoon and fork
- Cupcake tin
- Cupcake paper
Valentines Cupcakes Recipe:
- Preheat oven to 180C/160C fan/gas 4.
- Mix the butter and sugar in a bowl.
- Stir in the beaten eggs and vanilla extract.
- Mix the ingredients until the batter is smooth. Here, you can use an electric hand mixer or spoon.
- Fill up the cupcake paper by using a tablespoon to half of the paper with batter.
- Now, bake in the oven for 20 minutes. Remove from the oven and put aside to cool.
- To make it more attractive you can decorate it using Wilton 2D piping nozzle.
5. Decorative Mug
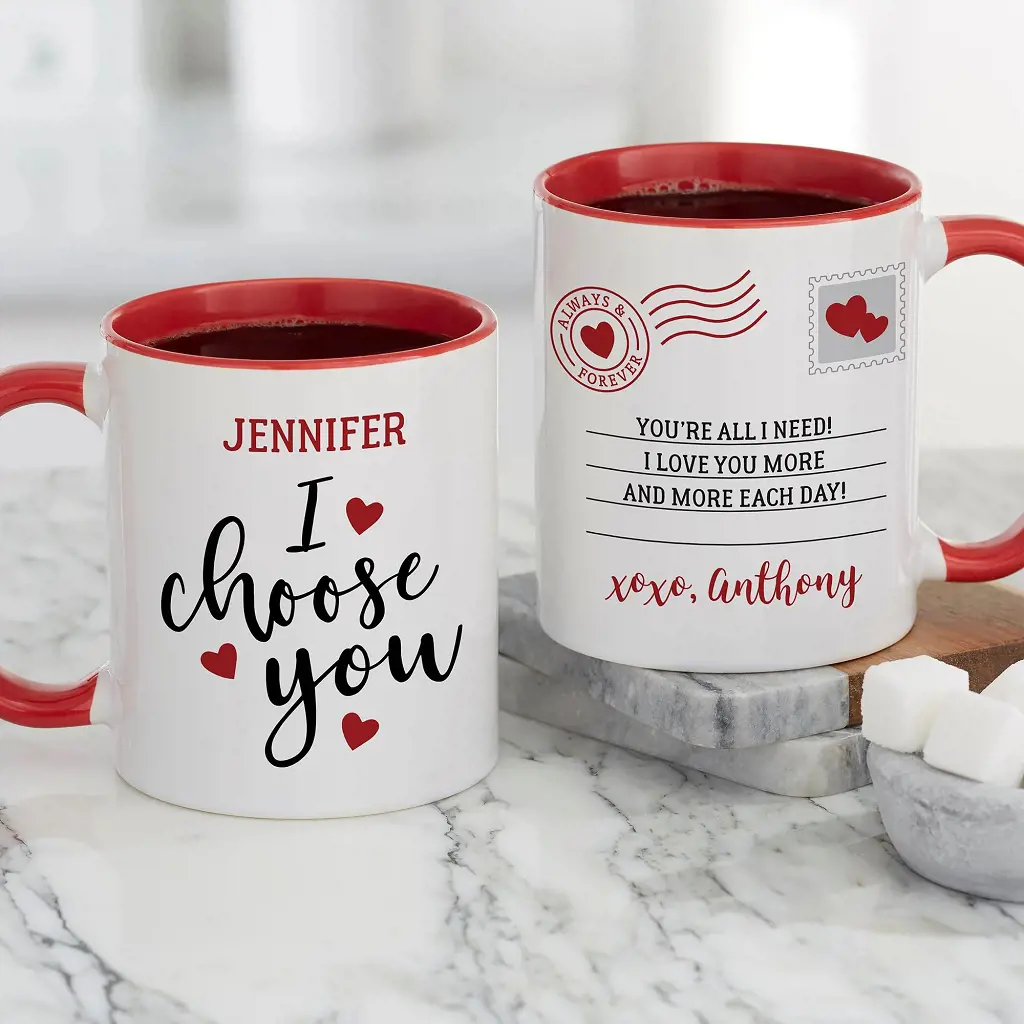
Make this Valentine's Day cute and loving by creating DIY decorative mugs for both of you. This DIY is perfect for the real artists there.
If your man loves to drink coffee, then this is one of the best Valentine's Day gifts you could get for him. Everyone like their name written on something that they drink every day. This item is an easy gift to make at home.
You can also try making DIY ceramic mugs for a great personalized gift.
Things Required To Make Decorative Mug:
- White Ceramic Cups or any other that you find attractive.
- Sharpies or any colors as long as they are permanent.
- An oven
How To Make A Decorative Mug?
- Preheat the oven to 350 Fahrenheit.
- Think up your design and draw it out on your cup with your markers.
- Set the cooking time in your oven for 30 minutes and stick your mug in.
- After 30 minutes just leave the mug in there to cool off.
- When they cool off you can take them out and you are done. The design is now baked onto the mug.
6. Valentine’s Blooming Love Jar
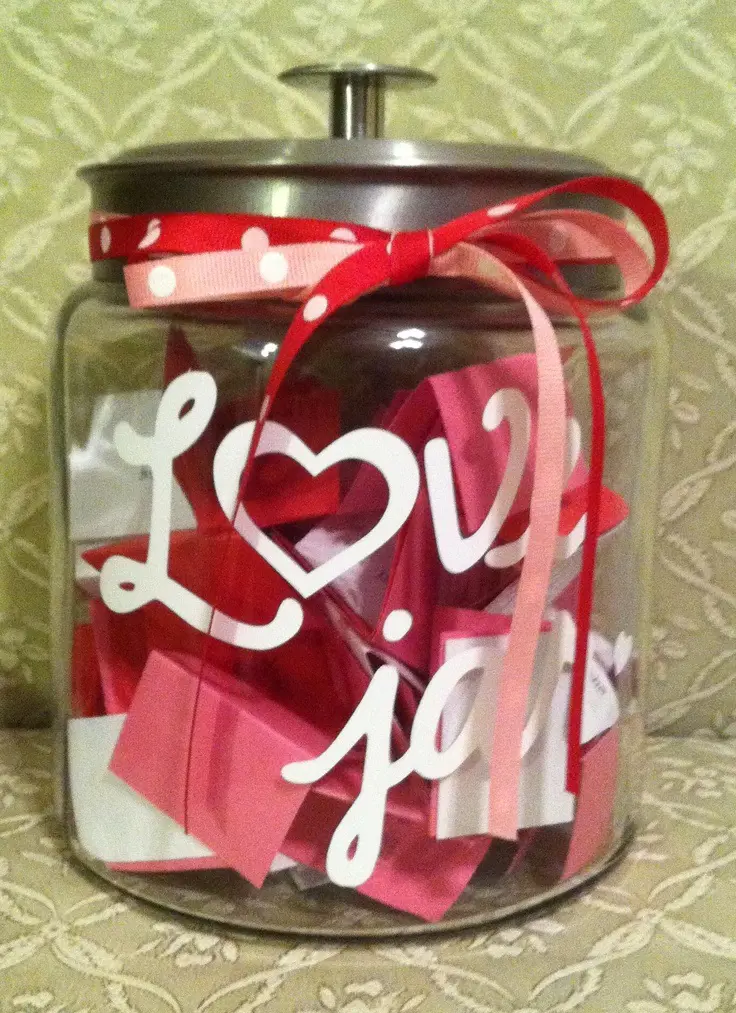
If you are looking for a simple yet beautiful and romantic gift for him then just DIY this love jar. Get creative and prepare the perfect one.
Some of us may feel awkward every time to express our love for others. It may be easier for them to write things.
So, let's just fill a Love Jar this Valentine's full of loving thoughts and express our love for them. It's simple to make and only needed a few items that you may have in your home.
Things Required To Make Love Jar:
- A Mason Jar
- Glitter Pens and Paint Pens
- Ribbons
- Scrapbook paper
- Stickers (optional)
How To Make The Love Jar?
- First of all, cut out enough scrapbook paper into a heart shape. Make sure they aren't too big as they need to fit into the mason jar.
- Then, decorate your jar using ribbons, stickers, or any other things.
- After that share your loving thoughts by writing on those heart-shaped scrapbook paper just like I love you because...., I love you when... or something like this.
7. Sweet Photo Frame
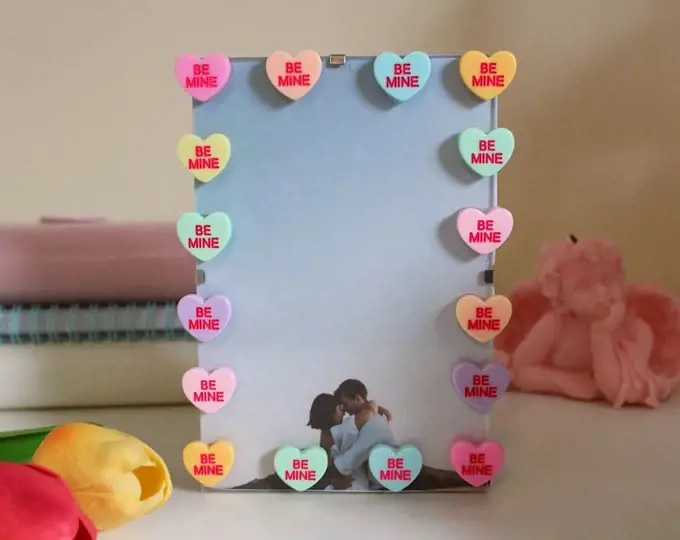
Making a photo frame including your couple's picture is nothing but just a phenomenon. This is the best one which he will always remember.
It is simple as well as affordable plus it does not consume more time. To get it to start you need to collect some materials for it.
Things Necessary To Make Photo Frame:
- Photo Frame
- Ruler
- Pencil
- Scissors
- Paintbrush
- Mod Podge
- Decorative papers, stickers, flowers, or any attractive things.
How To Make A Valentine Special Photo Frame?
- Use the photo frame of the size you required for this work. Remove the glass so that you can decorate the edge of the frame.
- Now coat the front of the frame with Mod Podge, and flip over the decorative paper you can also use flowers and some stickers here so that the side you want to face the photo looks more attractive.
- Coat the sides with Mod Podge, and then wrap the outside and inside the edge of the frame just like wrapping a present.
- Now, flip the frame over and coat it with Mod Podge. Once it is dry, replace the glass and just fill it with your favorite picture.
8. Customized DIY Cufflinks
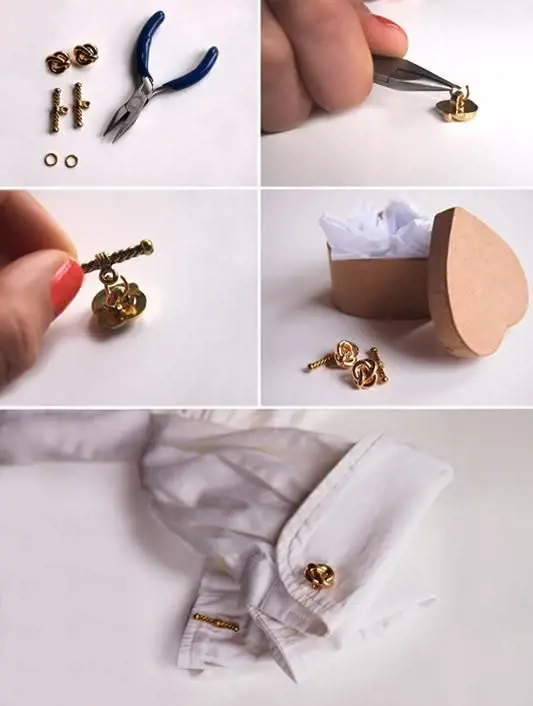
Spending time on DIY cufflinks is something incredibly thoughtful idea for someone. If your man likes to dress up then you can surely gift them it.
This gift shows them that you better know them and their personality. From the time of their creation, cufflinks have been seen as a symbol of status for men.
Here is the list of the things required to create this beautiful present for him.
Things Required To Make Cufflinks:
- Two cufflink blanks
- Clear nail polish or acrylic craft paint
- X- Acto or utility knife having a sharp blade
- Glue or Glue gun
How To Make Cufflinks?
- First, choose the images that you want to use for the two sides of your cufflinks. Try something related to Valentine's or the theme in red.
- Once you have selected the images then print them out on an adhesive plastic sheet which you can get from any craft store or art gallery.
- By using the help of an X-Acto blade or Utility knife just cut around each image.
- After finishing cutting them, coat both sides of each one with acrylic paint or nail polish.
- Take a glue gun and apply it to the back side of the printed paper on which you had printed the images.
- Now, apply these images to the metal blanks and let them dry for at least half an hour.
- Later on, after it is dried make sure that your images are fixed on it.
9. Crochet Heart Blanket
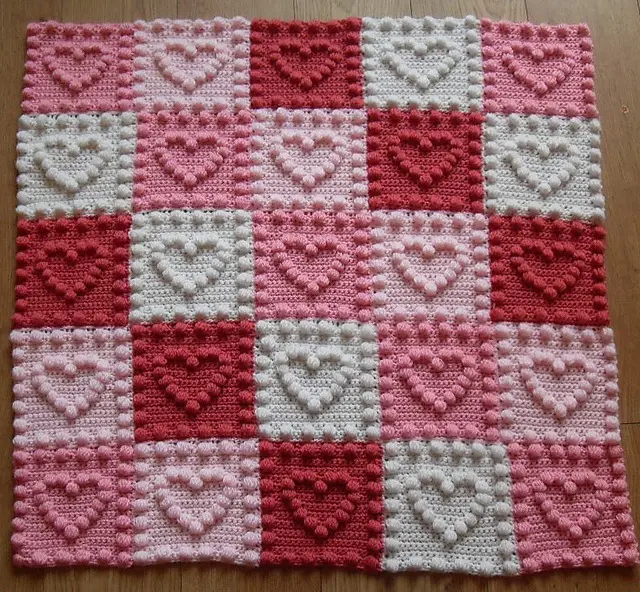
Handmade gifts are perfect and the most valuable choice whenever you want to give your loved ones. This Valentine's just DIY the heart blanket that would help you to make him feel the warmth of your love.
This gift will help you to express your affection to the people who are the most precious in your life. In every step, you can have new patterns and generate a unique idea.
For this Valentine's I prefer you to have blankets in red and white colors as it is the best combination of colors.
Things Required To Make Crochet Heart Blanket:
- Yarn with your favorite color.
- A hook size of 8 millimeters is perfect.
How To Make A Crochet Heart Blanket?
- First of all, place the yarn into the hook and make the twelve chains on the hook
- We are going to start in the third chain from the hook with a regular half-double crochet and your first row will be all half-double crochet.
- Going forward throughout the rest of the pattern we will always be working into the back loops.
- Always working into the back loop there is no pattern repeat.
You can just do your own number of chains per the requirements of your blanket.
10. DIY Miniature Notebooks
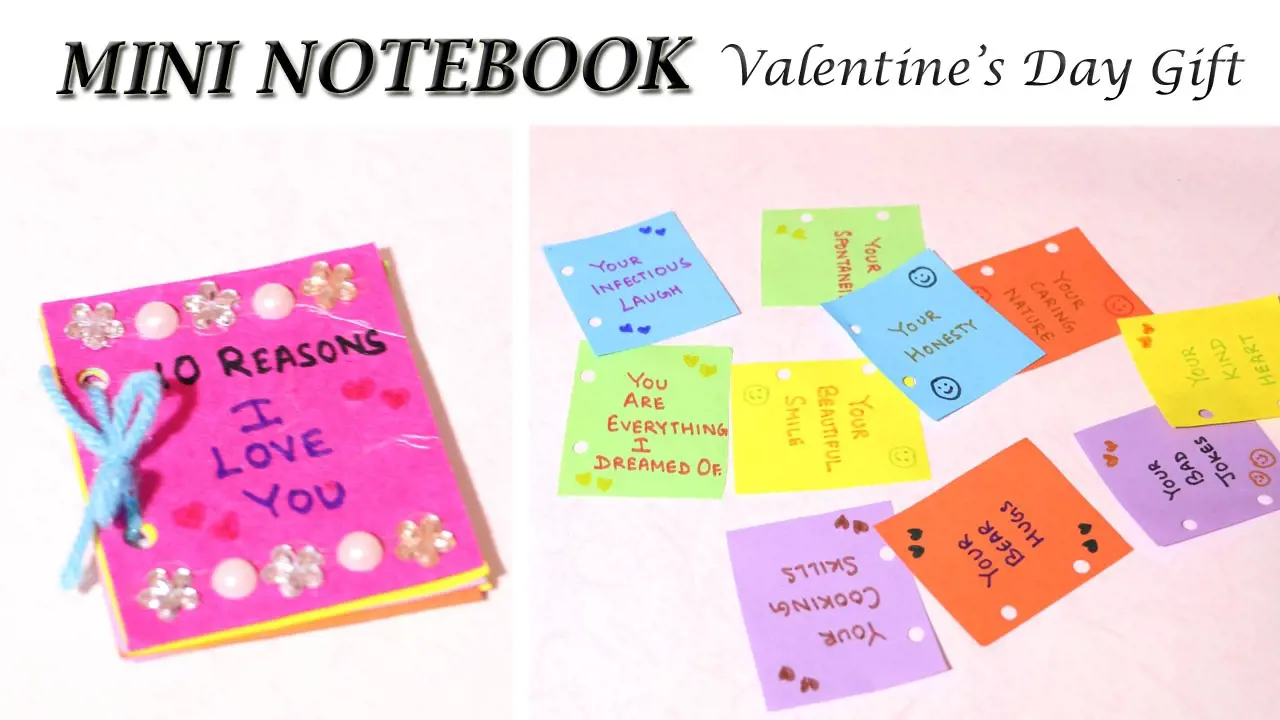
Miniature Notebooks are the cutest gift made especially for Valentine's Day. For this Valentine's, you can also give it one try and DIY it in your own way.
This mini notebook can be personalized to make a Love book for Valentine's Day by writing love quotes or unique love notes or valentine's day messages for your loved one.
The best accomplice for any creative thinker. It is easy to make and is a beautiful way to express your love this Valentine's Day.
Items Needed:
- Scissors, Craft Knife
- Ruler, Glue, Blinder Clip
- Plain Paper for the inside pages
- Colorful Papers for the cover and end of the paper
- A piece of thick card.
How To Make A Miniature Notebook?
- Cut the required pages of size 3*4 cm, for each mini book.
- Align the pages and hold them together tightly using a tight binder clip.
- Cut some grooves using a knife. Do this carefully.
- Now, take a colorful piece of paper and cut a piece of it roughly 3*4 cm. Apply glue thoroughly to the grooves in the spine.
- Stick the paper to the spin and press it slowly. Leave it to dry for around one hour.
- After this cut two pieces of thick card for the book each 3.1cm by 4.2cm.
- It's time to choose paper for the book cover. Cut a piece roughly 10 by 7cm.
- Stick the two cards on the cover paper with the glue leaving enough space for the spine in the middle.
- You can keep the cover simple or add details to the corners and spine.
- Choose an endpaper to match the cover, and cut two pieces of 6*4 cm for each book. Fold in the middle and stick the end paper to the bound pages.
- Apply glue on the end paper and attach it to the cover.
- Decorate the cover if you want with stickers or any art and fill the notes with your love messages.
Isn't it quite interesting to gift him? This sweet present will be heart-touching and a reminder for both of you.
11. Word Tile Frame
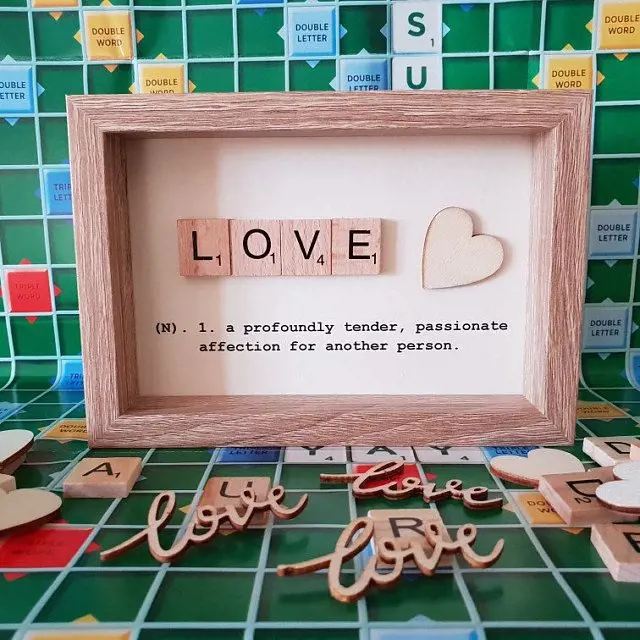
Here is another theme for this Valentine's. For the game lover, this might be an awesome DIY gift.
Let's just make it with a sweet message that they will enjoy reading again and again. This will also be good in the wall of their rooms. This will also make your mood always fresh and turn a bad attitude into a good one.
Collect some letter tiles from the store and also some of the best frames and go to work.
Items Needed:
- Frames
- Game tiles or scrabble
- Scrapbook paper
- Hot glue gun
How To Make A Word Tile Frame?
- Remove the glass from the frame first.
- Trace it on your scrapbook paper and then cut it out.
- Clean your glass and then put your paper and glass back in the frame.
- Lay out letters in the way you want.
- Use the hot glue on each letter tile and paste them directly into the glass.
12. Personalized Keychain
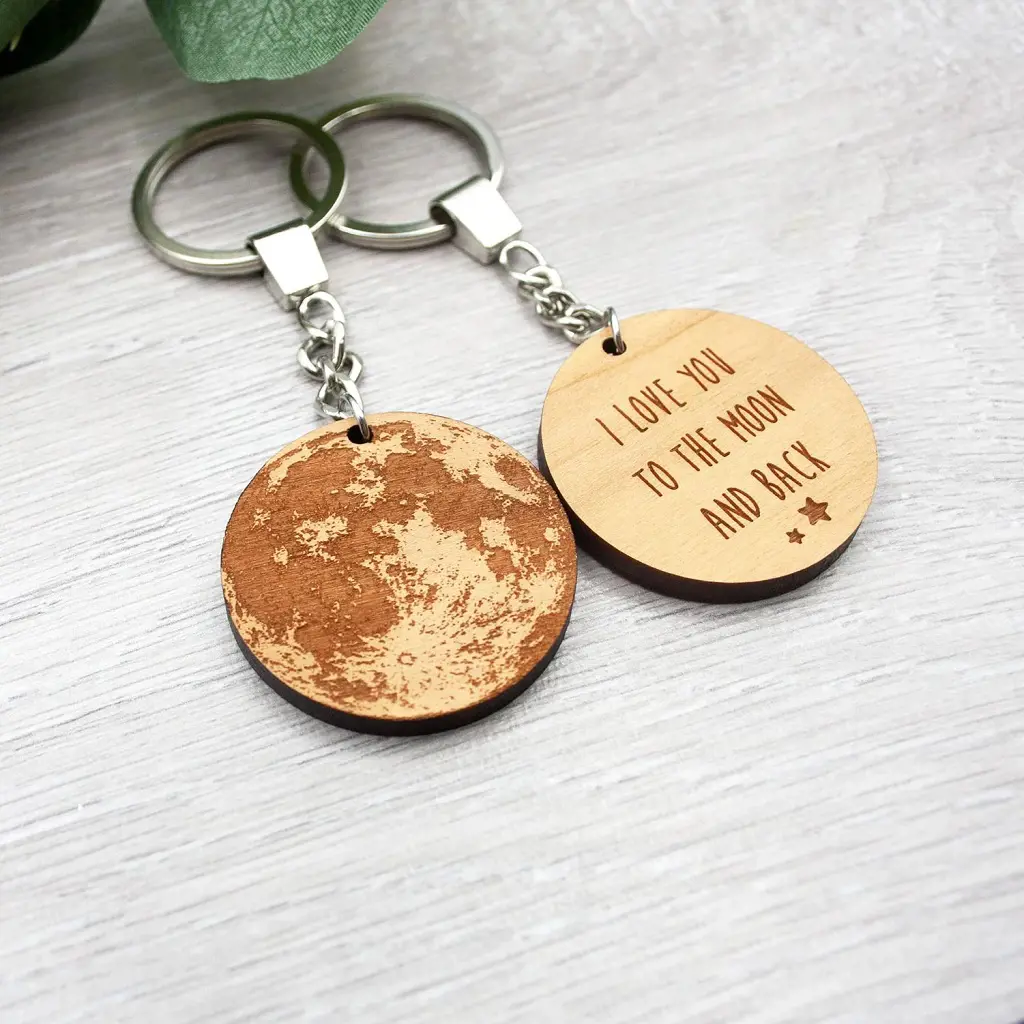
Looking for a thoughtful gift then here is a simple DIY for you this Valentine's. All you need is a little time and creativity.
Craft a keychain for him with a little message of love, or a simple leather one, you can also go through any images that hold beautiful memories for you both or any other related to love.
Things Required To Make Keychain:
- A metal blank tag
- Needle-nose pliers
- Letter stamps with letters of his name or photos or any other decorative things
- Hammer
- Anvil
- Glue Gun
How To Make Personalized Keychain?
- Pull the metal blank tag until they are loose enough to make holes in them.
- Use the needle-nose pliers to bend the ends into a loop.
- Now, that the tags are stamped into places, you need to find customized names, and photos that hold special memories for both of you or it can be any other decorative things on them.
- When it’s printed on regular computer paper, cut it out with scissors and paste it on the tag with a glue gun.
- Finally, attach the tag to a keychain and it is ready to gift someone.
Your partner can carry them with him all day and will be a perfect present.
13. Heart Magnets
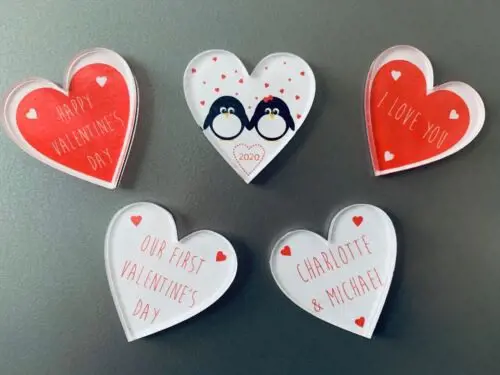
These heart-shaped magnets are so cute and eye catchy that they can be used to put in the fridge for the year around. You can DIY heart magnets for your loved ones.
You can make a photo magnet, heart magnet, or any other attractive decorative things like flowers, stickers, and many more.
These heart-shaped magnets are perfect for showing your love.
Items Needed
- Wooden Hearts or hard cardboard pieces are cut into heart shapes.
- Photos printed on paper.
- Mod Podge
- Red Paint or any other you would love to use
- Acrylic Sealer Spray
- Scissors
How To Make The Heart Magnets?
- Before doing anything, print out photos and make sure to fit them on your wooden hearts or cardboard pieces. Place the heart over the photo and trace it.
- Now you can paint the hearts with any colors you love but I prefer red here as this is for Valentine's gift.
- Spray the front and back of the photos just the area with the photos.
- Let it dry for about 15-20 minutes. Using sharp scissors cut out the heart shape, cutting inside your tracing lines. You may need to trim the photos to fit them into the wooden hearts.
- Paint a thin layer of mod podge onto the hearts.
- Just carefully flatten them out and let the mod podge dry.
- Repaint more mod podge onto the heart and place the photo on top of it and let them try.
- When dry, turn the hearts over and attach a magnet using a lump of mod podge. Let the magnets dry fully before using them.
This present will always remind them of your presence.
14. Romantic Bookmarks
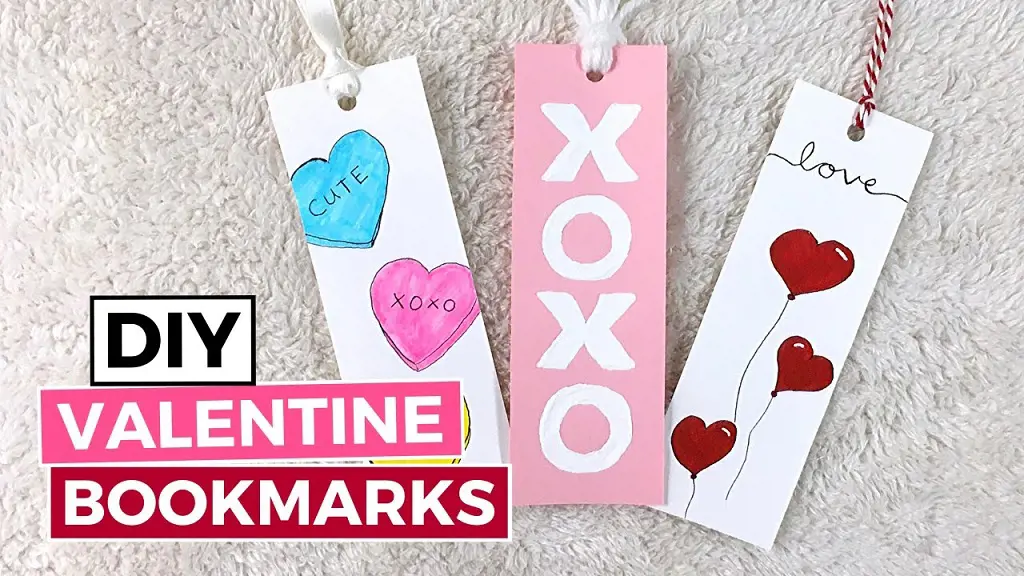
What better present for your book lover man than a personalized bookmark? DIY this one in the shape of a heart which will look more romantic and attractive.
For a reader, the bookmark is more useful while reading a book to keep track of where you have left them reading before you are starting it again.
You can make it according to his preferences as his favorite editions, or any themes related to this Valentine's. This DIY can be easily made at home with limited products.
Items Needed:
- Photo-quality printer paper or just hard colorful paper.
- Paint colors or printer (if you don't wanna paint it yourself)
- Paper Cutter
- Glue
- Laminator and Laminator Sleeves (Optional)
How To Make Valentines Special Bookmarks?
- Design the Bookmark Layout the way you want. Here, you can paint it yourself by using colors or just print out the patterns that your loved ones love.
- Show your creativity at this point you have to explore your designs. Here, you can customize the gift with decorative things also.
- Now, if you have used the graphical designs then just print it out otherwise leave the paint to dry.
- It's time to cut them in the shape you want. Here, you can use a paper cutter.
- Laminate it or just let it be.
- Finally, let it finish by tieing the ribbons on the top of the bookmarks as it will be easy to use it.
It might consume a little bit of time but it is the best present to book lovers. This cute bookmark will not only keep on their page, but it will also remind them that they are special to you.
15. Handmade Valentine’s Love Bulb
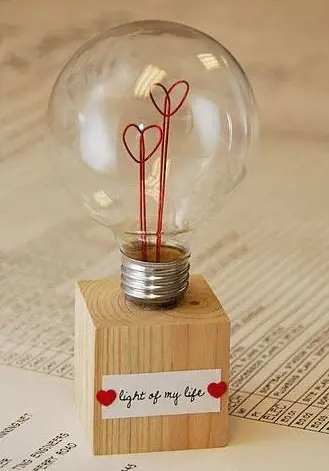
If you are in search of unique and crafty gifts this one is ready for you. You can DIY the light bulb which represents that your loved ones have lightened up your world.
Say you light up my life as a gift for your Valentine expressing with this light bulb which has a heart inside it.
It is easy to make and can be a perfect and thoughtful gift for him. All you need is a new or used light bulb and some craft wire.
Things Needed:
- Red thin gauge wire (available at craft stores)
- Light bulb
-
Pliers
-
Screwdriver
- Safety goggles/gloves
-
Scrap piece of wood or wood cube
-
2 pins
- Paper and pen
-
Wire cutters
-
Hammer and nail (Optional)
-
Hot glue gun
How To Make A Valentine’s Love Bulb?
- Make a surface on a table for hollowing out the bulb.
- First, grip the point and give it a good twist. You will leave the brass contact and break one of the wires leading to the filament.
- Once the contact has been pulled out, carefully crack the glass insulator.
- Use the screwdriver to break the fill tube.
- Then just clean the bulb using a paper towel and wire hanger.
- Now, cut a ten-inch piece of wire to make a heart filament. Fold the wire in half to create a sharp crease, then unfold.
- About an inch from the crease, take both loose wire ends and loop both wires around to create the heart halves.
- Then pull both wires back down, overlapping the center of the crease and extending beyond the heart shape.
- Take your filaments to your bulb and hold them up to see how long it needs to be to have the heart filaments placed roughly in the center of the bulb.
- If you are using firmer wood, use a hammer and nail to create a small hole, then remove the nail and push the wire down into the hole.
-
Fit your glass bulb over the filaments and glue the bulb down to the wood at the base with hot glue. Use the pins to connect your love message on the front side of the wood.
16. DIY Customized Candles
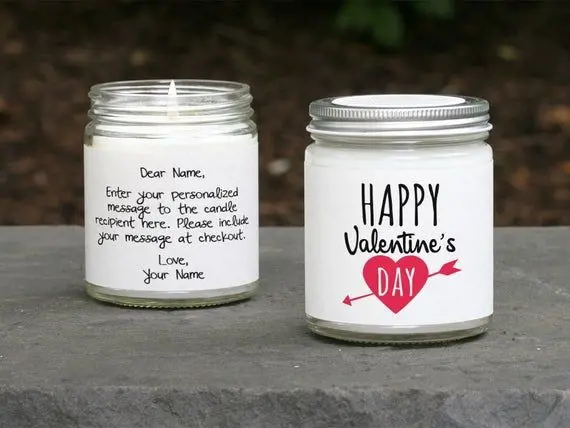
Candles as a gift stay true to the emotional idea of giving. One of the sweetest gifts for him is customized candles.
Candle gift sets are simple, intentional, and thoughtful and everyone will genuinely appreciate them. If your man likes simple things, then just be sure that this is the best present for him.
So, here are the required things to make the candles and make your personalized candles.
Things Required For Customized Candles:
- Container, glass jar, or wooden box.
- Glue
- Wax color to carve your message or you can use a computer and printer to print the design.
- Scent for the smell
- Glitter, Ribbon for decoration (This one is optional)
How To Make Customized Candles?
- First, take the container for your candle and decorate it as per your choice.
- Then, choose the scent for the smell if your man likes candles that smell good.
- Now, pour the wax you selected into the container, and let it down for a while until it cools down and carefully carve your message or here, you can use the printed image.
- You can now make it more attractive by decorating it with ribbons and glitter.
The smell of the candle will surely make your loved one feel special. And, for sure the light of the candles with also make your relationship brighter and stronger.
17. Heart Coasters
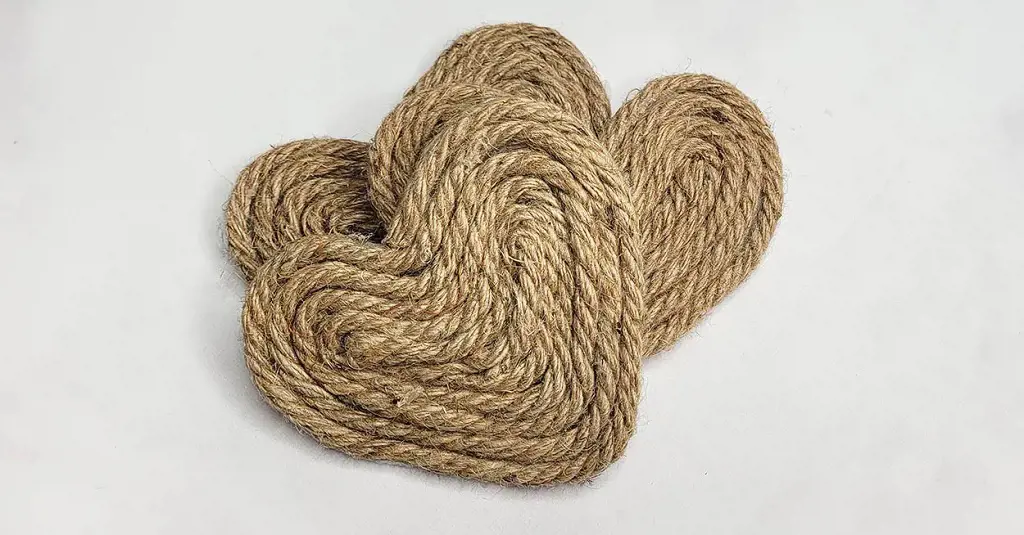
Heart Coasters are the perfect products for this Valentine's Season. Bring out your creativity by making these coasters for him.
Coasters are regularly used by people at any time. This will be the most beautiful and useful present for your man.
You can make it in different ways as crochet heart coasters, rope heart coasters, wooden coasters, and many more.
Here are the details about how to make Valentine's Coasters with Rope. You can also make this one or another one as per your choice.
Items Needed
- Rope
- Felt Sheets
- Scissors
- Hot Glue with the Glue gun
- Pen and marker
- Sheet of thicker Card Stock
How To Make Heart Coasters?
- Fold the card stock in half and cut a half-heart shape. Trace the heart template onto felt and cut it out.
- Heat the glue gun then cut one end of the rope at a slight angle.
- Attached rope onto the bottom of the sheet heart with hot glue. Continue gluing a small section at a time.
- Keep wrapping until the sheet is covered.
- Trim any excess felt and rope shaggy.
- Lastly, you can also paint that rope to make it more attractive and colorful.
18. DIY Earphone Cases
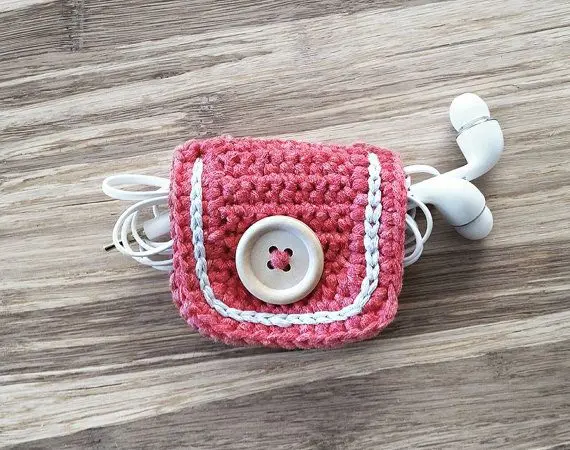
Is your loved one a person who carries earbuds with them wherever he goes? If so, then this will be the best DIY for this Valentine's week.
You have probably found them getting irritated with the tangled earphones. Now, you can get them DIY earphone cases which you can make through different things which are easily found in our houses.
Some of the things that can be used to make them are obsolete credit cards, clothespins, hard cardboard, and others. You can even sew the cases for them with your designs.
Items Needed:
- Sewing Machine
- Fabric
- Scissors
- CD or any round shape tool
- A thread that matches with fabric
- Zipper that also matches with fabric
- Snap Hook
How To Make Earphone Cases For Valentine?
- The first thing you need to do is just trace your CD onto the back of all three of your materials. You need to trace two CDs onto the back of each material.
- Now, we have all done with tracing the CD then we are going to cut all six of them out.
- So, when you are done cutting all your circles you are now going to fold one made out of each material and half like a little taco and put your scissors down the slit and cup so now you will have one whole circle and two half circles out of all your materials.
- Right now it is time to add the zipper. You are going to take one semicircle of your outside fabric light face up on the table then take your zipper and place it face down so that the teeth are touching the fabric.
- Then, line up the edges then place a half circle of your interfacing, and then a half circle of your lining fabric line all of those up and clip them together.
- After this just sew them together and you need to use a holder-inch.
- When you are sewed open it up you are halfway done now take your other printed fabric semicircle place that faces side up and make your zipper teeth side down line it up with the edge of that fabric so that the ends are at the same place.
- And then you are going to add your semicircle of interfacing and your semicircle of lining fabric then put them together and sew it.
- Now, all you need is to cut off the zipper that's hangover on both sides and clean up the edges too.
19. DIY Shoelace Bracelets
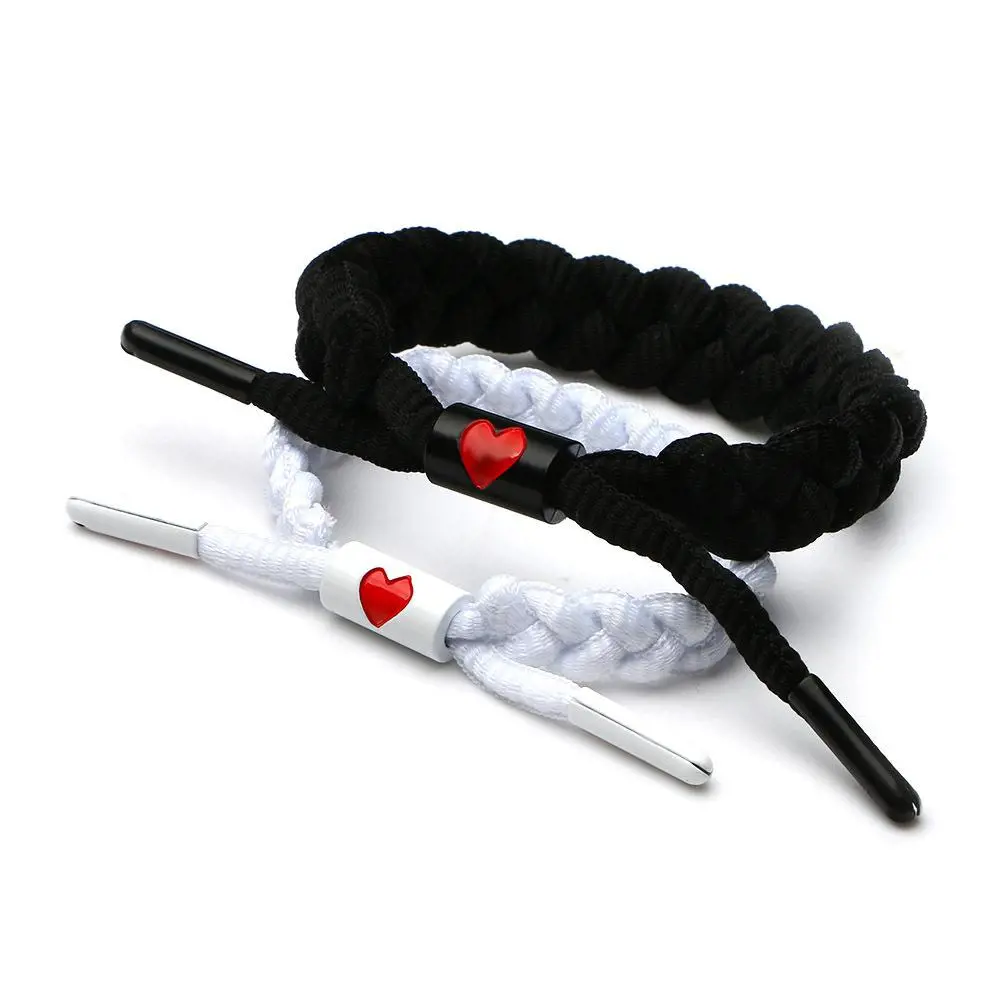
Shoelace bracelets are one of the best Valentine’s Day gifts for your man because they are super easy to make. You can DIY shoelaces for a unique present for this love week.
As this is the gift for Valentine's day you can make the couple bracelets for both of you. Even you don't need much more things to make this one.
Items Needed:
- Four waxed shoe laces
- Four small rubber
- Brass lobster clasp
- Brass Cord ends
- Brass Jump ring
- Super glue
So, are you ready to make this? I can guarantee you it's easy.
How To Make DIY Shoelace Bracelets?
- Get all four cords and tie the knot.
- Braid it but far from the knot.
- Close it with two bands.
- Untie the knot and close it with the other two bands.
- Measure the right length and cut off the ends.
- With the use of superglue stick the cords inside a cap.
- Now attach a jump ring with a clasp to a cap.
Shoelaces don’t look like much at first glance, but when combined together in this way, they become nice bracelets.
20. Explosion Box
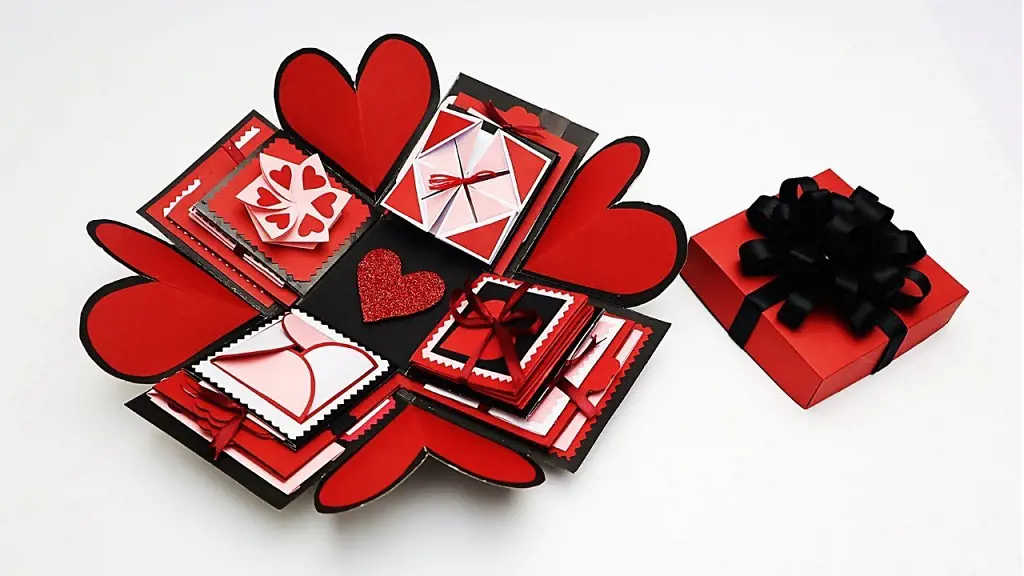
The explosion box sounds quite terrifying but, in this one, the layers explode to reveal photos, notes, and other decorations inside it. Make the DIY for this and gift him.
This will make for an amazingly crafty and creative Valentine’s gift for him. You can fill it up with pictures, meaningful moments, and love notes to make it more sentimental.
Decorate the box with a red theme cause it's Valentine's.
Items Needed
- Solid Colored Cardstock
- Printed Cardstock
- Adhesive
- Paper trimmer
- Photos, Notes, or whatever you want to put inside
- Embellishments or stickers.
How To Make DIY Explosion Box?
- Decide how many layers you would like to make in your box. Cut your card stock as per the measurements you required.
- Find the perfect measurement for the greater piece of cardstock. Measure from one edge of the cardboard and get it. Rotate the paper and repeat it. Do again twice more until the card stock has been into four times. This process will divide the paper into nine equal size boxes. Repeat with the other layers of cardstock.
- Fold in the card stock along all lines. Again, you should see nine equal size boxes on each sheet of card stock.
- On the largest piece of card stock, make a diagonal fold through each of the corner boxes. The diagonal fold should fold down while the other folds fold up.
- On the largest piece of cardstock, trace the heart from the cutting guide and cut it out as shown or you can use any adhesive glitter hearts.
- Now, on the other pieces you can decorate them. Layer the largest piece of cardstock on the bottom, then center the next piece over it and adhere it to the center of the box.
- Print the lid template on the back of the printed card stock. Cut along the lines, then fold along the dashed lines. At each corner, cut up to where the dotted lines meet from one side only. Here, you are not removing the corners but making a flap so you can glue the lid together.
- Fold over the flat at each corner and add the adhesive you want though I prefer the red one, then press them making a box lid.
-
Design the box as you desire, and add photos, notes, etc. When finished, then assemble up the sides of the box, fold the hearts in toward the center, and place the lid on top.
Finally, our explosion box is ready to explode. It’s a great way to preserve and share your favorite memories.

