How To Clean Laptop Keyboard Safely
Believe it or not, one research conducted at the University of Arizona found that the average keyboard had 400 times more bacteria than the average toilet seat. Shockingly it's a fact. Additionally, there have been many findings of deadly drug-resistant bacteria in keyboards that can survive up to 24 hours.
This information shows the importance of cleaning your laptop and its keyboard, so stop making excuses. If you are unaware of how to clean your laptop keyboard or MacBook keyboard this article is dedicated to you. Patiently follow these steps and make your keyboard healthy.
Tools And Material Needed

Before you begin, gather the necessary tools it will make it easy, as you don't need to go to search in the middle of cleaning your keyboard. These tools are readily available and easy to use for the best way to clean laptop keyboard.
- Microfiber Cloth: A microfiber cloth is a soft, lint-free fabric that you can use to wipe down the keys and the surface of your keyboard. It helps remove dust, dirt, and fingerprints without leaving behind any residue.
- Soft Paintbrush or Toothbrush: You can use a soft-bristled brush, such as a paintbrush or toothbrush. It gently sweeps away debris between keys.
- Cotton Swabs: Cotton swabs are useful for cleaning hard-to-reach areas around and under the keys.
- Isopropyl Alcohol: This is also known as rubbing alcohol. You can use this to disinfect and clean your keyboard. It helps remove sticky residue and sanitize the keys. While using this, make sure to use it sparingly and avoid letting it drip into your laptop.
- Compressed Air: A can of compressed air is an essential tool for blowing out dust and debris from between the keys. It helps dislodge and remove particles that are difficult to reach with other cleaning tools.
- Cleaning Slime or Putty (Optional): Cleaning slime or putty is a sticky, pliable material that can be pressed into the gaps between keys to pick up dust, crumbs, and other small particles. It's an effective way to clean hard-to-reach without damaging the keyboard.
- Handheld Vacuum with Brush Attachment: A handheld vacuum with an upholstery brush attachment can be used to suction debris out of the keyboard. The brush helps trap and remove dust and particles as you slowly move it across the keys.
Step-By-Step Guide To Clean Your Laptop Keyboard
Now after collecting all the materials needed it's time to clean the keyboard, and to clean perfectly follow these steps:
1. Shut Down and Unplug Your Laptop
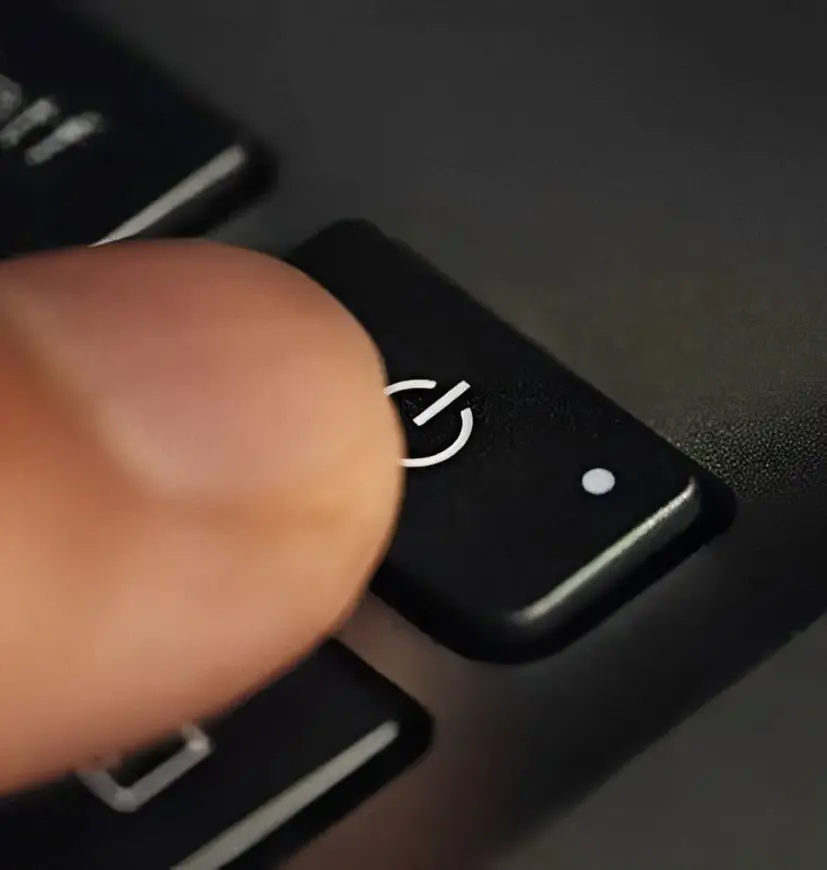
This step is critical to prevent electrical damage or accidental keypresses. So, shut down your laptop entirely, then unplug it from the power source. If your laptop has a removable battery, it's a good idea to take it out to be extra safe.
2. Flip the Laptop Upside down
Before using any tools, flip your laptop upside down and gently shake it. This step will dislodge any loose debris like crumbs, dust, or small particles, that may have accumulated beneath the keys. Do this over a surface that you can easily clean afterward.
3. Use Compressed Air to Blow Out Dust

Next, use a can of compressed air to blow out any remaining dust and dirt. Hold the laptop at a slight angle and spray the air into the keyboard at an angle to reach the areas under the keys. After that, move across the keyboard row by row, ensuring you cover all the keys. Be careful not to hold the can too close to the keyboard, as the force of the air can damage sensitive components.
Tip: Use short bursts of air rather than a continuous stream to prevent moisture buildup from the compressed air.
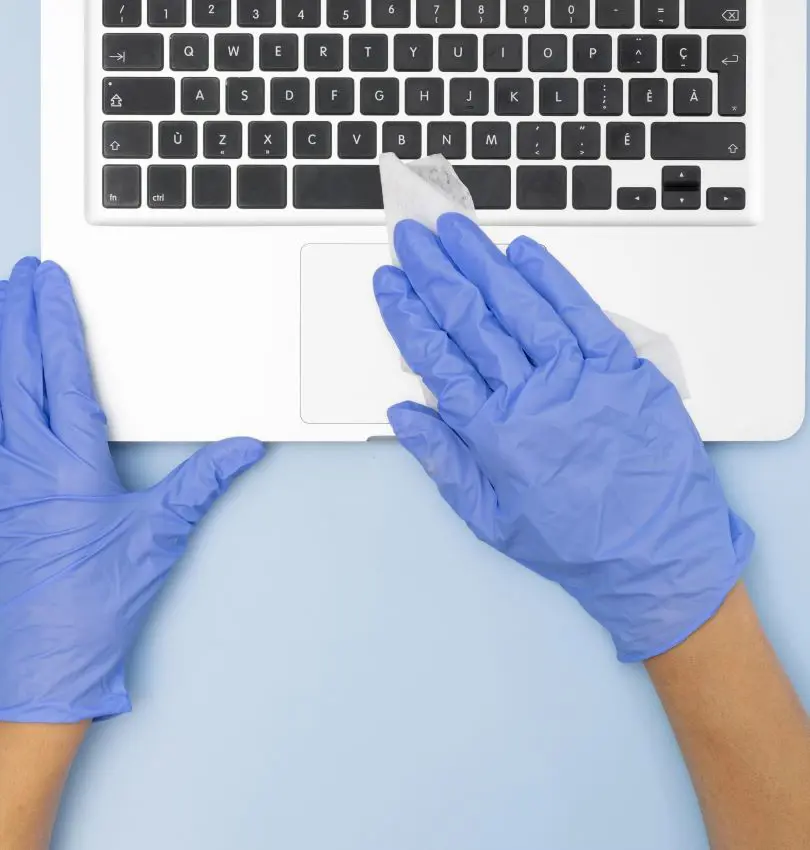
4. Wipe the Surface of the Keyboard with a Lint-Free Cloth
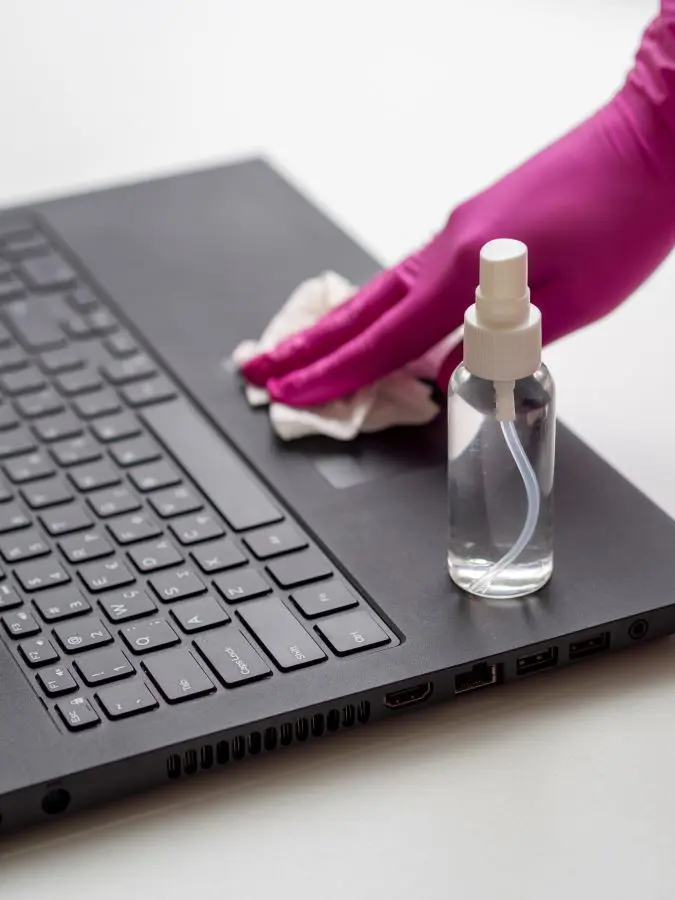
Take a soft, lint-free cloth such as microfiber and dampen it slightly with water or isopropyl alcohol. After that gently wipe the surface of the keyboard to remove oils and surface grime. Be careful not to oversaturate the cloth, as too much moisture can seep into the keyboard and damage the internal components.
Important: Do not spray any liquid directly onto the keyboard. Always apply it to the cloth first.
5. Clean Between the Keys with a Brush or Gel
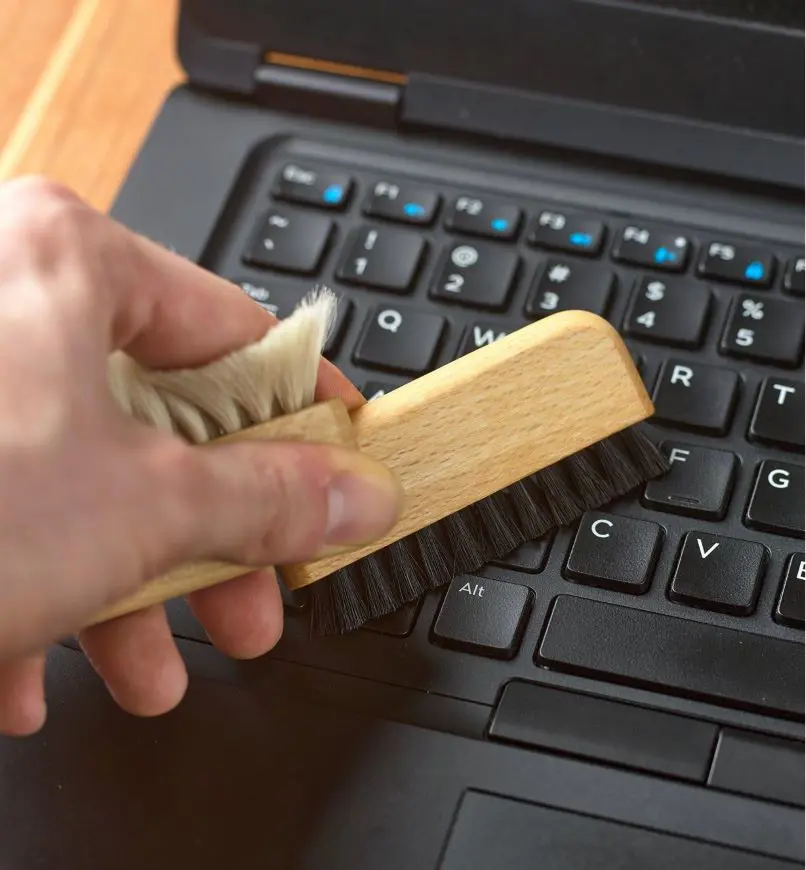
For dirt that's stuck between the keys use a small, soft-bristle brush (a clean toothbrush works fine) to dislodge it. Gently brush around each key, working the bristles into the gaps without applying too much pressure. Alternatively, you can use a cleaning gel or slime designed specifically for electronics. This gel molds the shape of your keyboard and lifts dirt when you press it down and peel it off.
6. Disinfect with Isopropyl Alcohol and Cotton Swabs
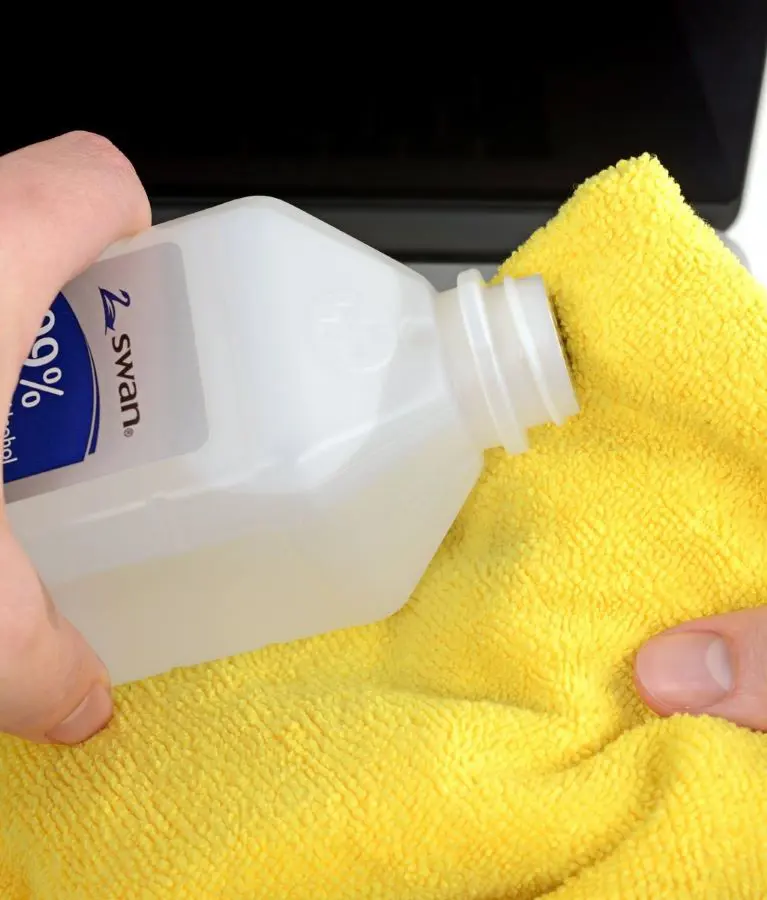
Once the general cleaning is done, it's time to disinfect the keys to eliminate bacteria and germs. Dampen a cotton swab with isopropyl alcohol (70% or higher) and gently clean each key, making sure to get into the nooks and crannies. Alcohol evaporates quickly and won't leave moisture behind, making it safe for electronics.
Tip: Avoid using household cleaning products like bleach or ammonia-based cleaners, as they can damage your keyboard and leave a sticky residue.
7. Dry the Keyboard
Once you have finished cleaning and disinfecting, leave your keyboard to air dry for a few minutes. Ensure that no moisture remains between or under the keys. If you are in a hurry, you can use a soft, dry cloth to gently dab away any leftover moisture.
8. Plug in and Test the Keyboard
After your keyboard is dry, plug your laptop back in and power it on. Test each key to ensure it works properly and feels smooth. If some keys still feel sticky or unresponsive, you might need to repeat the cleaning process for those specific keys.
How To Remove The Keys To Clean A Laptop Keyboard
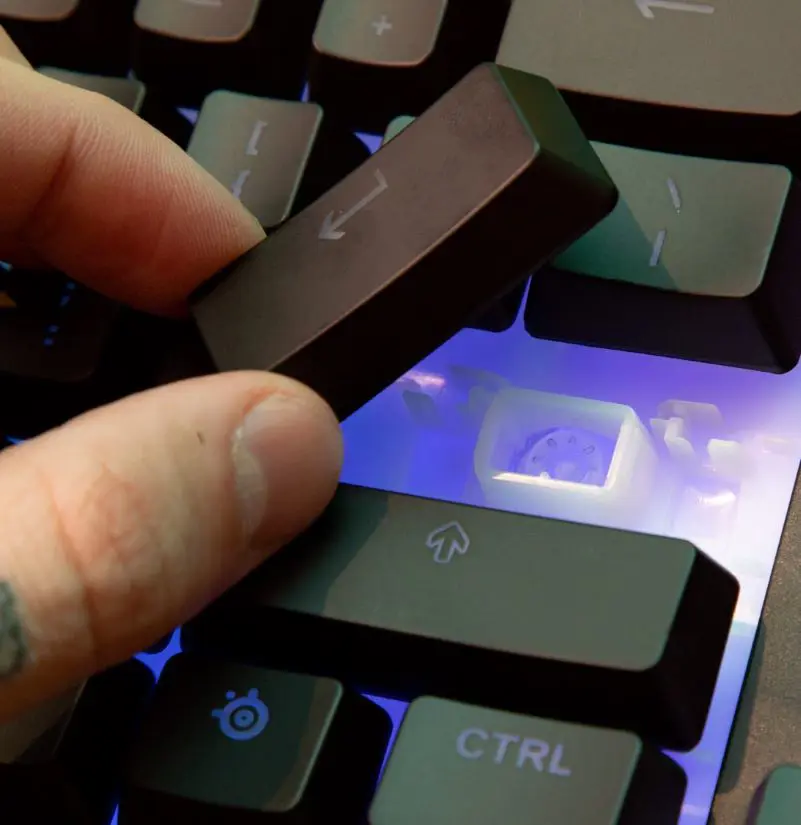
Before starting remember that not all laptop keyboards can be removed, and the ability to do so varies by model and manufacturer. If your laptop keyboard is removable you can follow these steps to clean it:
- Turn off and unplug your laptop
- Before you start removing keys, take a photo of your keyboard layout. This will help you remember where each key goes when you put them back.
- Use a small flat tool to carefully pry off the keys. Similarly, start from the edge and work your way in. Be gentle to avoid damaging the key or the mechanism underneath.
- Once the keys are off, use a microfiber cloth or cotton swap dipped in a small amount of isopropyl alcohol to wipe underneath. Make sure not to use much liquid to prevent it from dripping into the keyboard.
- Use a soft brush or compressed air to blow out any dust and crumbs that might be stuck in the keyboard.
- Clean the keys themselves with a cloth dampened with isopropyl alcohol. This helps disinfect and remove any grime.
- After everything is clean and dry, gently press each key back into place until you hear a snap. Make sure they are secure.
- Use compressed air again to blow away any remaining dust around the keys.
Important Tips
- Always be cautious when removing keys, as not all keyboards are designed for easy key removal.
- If you are unsure whether your keys can be removed, check your laptop's manual or look online for guidance specific to your model.
How To Keep Your Laptop Keyboard Clean For Longer Period?
We might not have time to clean our laptops from start to finish. So keeping them clean for longer periods is important to save time. Here are some of the ways you should follow to keep your laptop clean for a longer period.
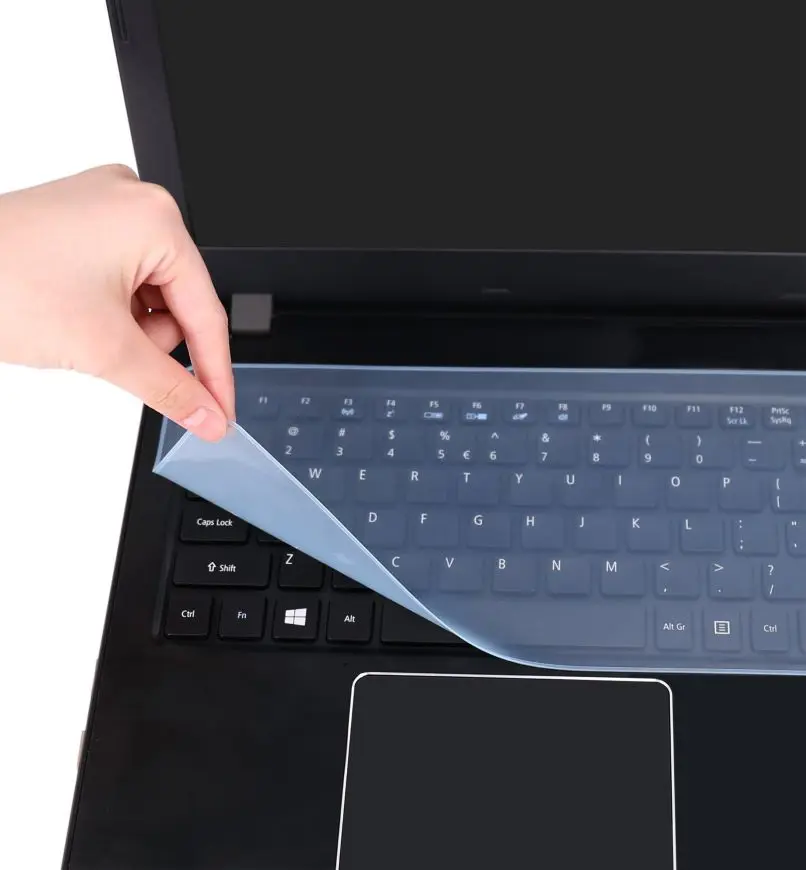
- Use a Keyboard Cover: A silicone keyboard cover can act as a barrier against dust, crumbs, and spills. Plus, it's easy to remove and clean, which saves you from frequent deep cleaning sessions.
- Wash Your Hands: Remember to wash your hands before using your laptop. This reduces the oils dirt, and grime transferred to your keyboard.
- Avoid Eating Around Your Laptop: You love to watch movies on the laptop by having snacks without being aware of food crumbs falling on the keyboard. Remember one of the main culprits for dirty keyboards is food crumbs. So, if possible avoid eating while using your laptop to minimize the mess.
- Vacuum Regularly: If you notice a lot of dust accumulating around your workspace, consider using a vacuum with a soft brush attachment to regularly clean your laptop. This helps reduce the amount of dust that settles on your keyboard.
- Keep Liquids Away: Spilling liquids on your keyboard can lead to irreversible damage. Try to keep drinks away from your laptop or use spill-proof cups when working near it.
Common Mistakes To Avoid When Cleaning A Laptop Keyboard
While cleaning a laptop keyboard, it's important to remember that laptops are not utensils and require a specific cleaning method. Thus, it's important to follow the steps mentioned above and avoid these common mistakes that we've discussed below.
- Using excessive liquid: If you think excessive liquid will make your keyboard cleaner then you are wrong. Keep in mind that too much moisture can lead to short circuits or damage internal parts. Thus, always dampen the soft cloth first, not the keyboard directly.
- Pressing too hard on the keys: Rough handling can cause keys to pop off or damage the delicate mechanisms beneath them.
- Skipping regular cleanings: If you skip regular cleaning then dirt and grime increase. It can eventually lead to sticky and unresponsive keys, which makes it harder to clean later.
What To Do If You Spill Liquid On Your Keyboard
Anything can happen, what if you spill liquid on your keyboard? No idea, right? Don't panic here's what you should do immediately:
- Quickly turn off your laptop and unplug it from the power source. If it has a removable battery, take it out immediately.
- Turn your laptop upside down to prevent the liquid from seeing further into the internals.
- Use a soft cloth to blot away as much as possible from the surface and between the keys.
- Allow your laptop to air dry for at least 24 hours before turning it back on. You may also use a fan to speed up the process, but avoid using a hairdryer as the heat can damage internal components.
- If the spill is significant or the laptop doesn't turn back on, it's best to take it to a professional for repairs.
Why Is It Important To Clean Your Laptop Keyboard?
Now, let's delve into the importance of cleaning your laptop. If you follow each and every step properly while cleaning your keyboard you will benefit from these things which we have discussed below:
1. Hygiene
Laptop keyboards can accumulate a serious amount of dirt, crumbs, and bacteria over time. Plus, different studies have shown that a keyboard can harbor more germs than a toilet seat, making regular cleaning crucial for minimizing health risks. By cleaning your keyboard, you can eliminate these potential health hazards, thereby reducing the risk of illness caused by germs and bacteria.
2. Performance
A clean keyboard contributes to better performance because dust and debris can interfere with the functionality of the keys. This leads to issues such as sticking or unresponsive keys which is irritating and frustrating sometimes. If you clean regularly it helps to ensure that the key functions smoothly, which enhances overall typing accuracy and speed.
3. Longevity
Maintaining a clean keyboard can extend its lifespan. Dust and dirt can infiltrate the internal components, potentially causing hardware issues that may lead to costly repairs or replacements. If you regularly clean your keyboard, you can prevent such buildup and protect your device from damage, ensuring it remains in good working condition for a longer period.
4. Aesthetics
A clean keyboard not only functions better but also looks better. A tidy workspace can enhance your overall computing experience. Finding crumbs or stains among the keys can be unappealing and distracting, so keeping your keyboard clean contributes to a more pleasant environment for work or leisure.